Favorite Uses for Essential Oils

Favorite Uses for Essential Oils


Have you heard about essential oils but aren’t sure how to use them–or even why you might want to use them? I started using them a few years ago with my family and in my home, and I would love to tell you a few of my favorite ways to use them and to encourage you to give them a try!

To freshen the air and bed sheets:

I have a little dog who sleeps in the bedroom with my husband and me. We keep her bathed and trimmed, but let’s face it, she still causes our bedroom to smell not-so-fresh sometimes. To help keep the room smelling fresh and to kill germs, I use essential oils in a diffuser each morning. As soon as my husband and I are up and out of bed, I add water along with a couple of drops each of 2 or 3 essential oils, and I let the diffuser run for at least 30 minutes while the bed is still unmade. Once the diffuser has had time to freshen the air and my sheets, I make the bed.

  • A few of my favorite essential oils for this purpose:
    • lavender
    • peppermint
    • lemongrass
  • You may also choose to use:
    • rosemary
    • eucalyptus
    • tea tree (melaleuca)
    • cinnamon bark

To help my children and me settle down and get ready for sleep:

Some evenings, especially after a really busy day, my children and I have trouble settling down and getting ready to go to sleep. It seems that we get stuck in “high gear” and can’t slow down! I’ve found that using essential oils in a diffuser in the living room or in each bedroom helps us a lot. About 30 minutes to an hour before bedtime, I put fresh water and a few drops of 2 or 3 essential oils into the diffuser in the living room or the diffusers in the bedrooms. Then we read or do something else quiet while the essential oils help us start to quiet down and relax.

My teenage daughter in particular benefits from having a few drops of essential oil massaged into the bottoms of her feet about 30 minutes before bedtime. Lavender and cedarwood work very well for her. Both of these oils can be used neat (which just means they can be applied directly to the skin without being diluted), so I massage a drop of cedarwood onto the bottom of each foot followed by massaging a drop of lavender onto the bottom of each foot. Cedarwood doesn’t smell very good, so we always use that one first. Using lavender second helps get rid of the cedarwood smell. But cedarwood truly helps so much that it’s worth the not-so-wonderful smell!

  • A few of my favorite essential oils for this purpose:
    • lavender
    • cedarwood
  • You may also choose to use:
    • orange
    • ylang ylang
    • chamomile

To freshen my laundry:

Not long after I began using essential oils, I read about using them to help freshen laundry. I don’t like to use fabric softeners in my washing machine or dryer because of the chemicals they contain, but I do like for my laundry to smell fresh and clean. I also want to be sure it really is as clean and germ-free as I can get it. For these reasons, I began using eucalyptus essential oil along with my detergent to help get rid of dust mites on sheets and towels. It can also help kill germs. (Then I put vinegar into the cup meant for fabric softener. The vinegar helps get rid of all traces of detergent and washes away the eucalyptus smell so that my clothes smell fresh but don’t have a medicinal smell.)

I usually put a drop or two of eucalyptus into the laundry detergent cup right after I put in the detergent. (You can do this with liquid or powder and with store-bought or homemade detergent.) I also often put a couple of drops of orange or lemon essential oils onto a wash cloth and toss it into the dryer with my clothes when I want them to smell extra good!

One final way I use essential oils with my laundry is when I make a spray that I spritz onto my clothes as they hang on the clothesline during the summer. I love this linen spray! I know commercials often show clothes hanging on the clothesline and mention how fresh and clean they smell, but the truth is that clothing from the clothesline really doesn’t have a very pleasant smell, so I use this linen spray to make them smell good! When my kids were younger, they loved to spray the clothes on the line! It made them happy to help hang out and bring in the laundry–and that’s always a good thing!

To make my linen spray, I mix 10 to 20 drops of lavender (or other essential oil) into 2 tablespoons of witch hazel or vodka. (Essential oils won’t mix well with water, so the witch hazel or vodka is necessary.) Then add 3 ounces of water. Mix well. (I like to shake mine up in a jar with a tight-fitting lid.) Then pour into your spray bottle. This recipe makes about 4 ounces of linen spray. I usually make about 12 ounces at a time in a larger spray bottle so I don’t have to make it as often. Each time I use it, I simply shake the spray bottle to make sure everything is mixed well.

  • A few of my favorite essential oils for this purpose:
    • lavender.
    • eucalyptus
  • You may also choose to use:
    • orange
    • lemon
    • peppermint

To help my students stay attentive:

Another way I like to use essential oils is to help my children pay attention while they do their school work. I simply put a few drops of peppermint essential oil in my diffuser and let it run in whatever room my children are doing their school work. If I forget, my children will ask for me to turn on the diffuser because they feel like it helps them so much!

  • A few of my favorite essential oils for this purpose:
    • peppermint
  • You may also choose to use:
    • vetiver
    • lavender
    • frankincense

These are a few of my favorite every day ways to use essential oils. If you’d like to find out more about using essential oils, getting a good guide book is a very helpful way to learn more. The following are a few of the guide books I use:

ONE OF HEIDI’S FAVORITE BRANDS IS SPARK NATURALS, AND YOU CAN USE THE COUPON CODE THEBUSYMOM FOR 10% OFF ALL THE TIME!

Do you use essential oils? If so, please share your favorite use in the comments! We’d love to hear from you!


Gluten Free Pad Thai {YUM}

Pad_Thai_Cover


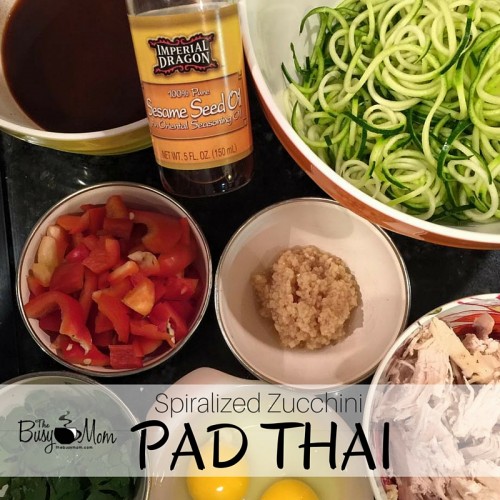
So, last summer, my friend Jane was using a spiralizer while I was visiting and I was fascinated. We’ve been gluten-free in our home for about 18 months and the idea of using veggies for noodles seemed like something I should try. I’m so glad I did! This recipe is totally authentic tasting, because the sauce is fabulous, too.

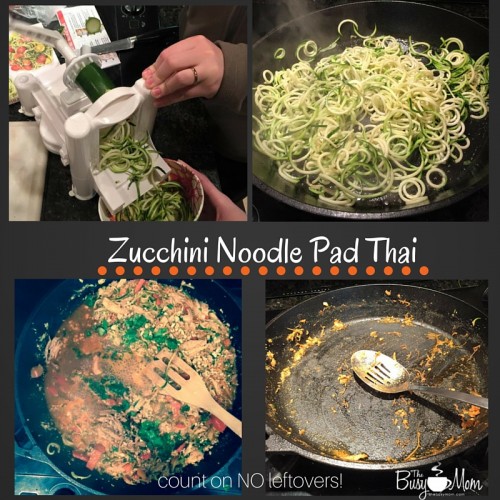
I thought for sure the kids would make faces and squirm at the idea of zucchini noodles. Let me just say: there were NO leftovers. Everyone loved it, even the five year old and my mother in law. Believe me, your whole family will love it. #winning

This recipe works exactly the same way with traditional pad thai noodles, too.

Here’s the recipe!

Serves 8-10
Ingredients:

Pad Thai with Zucchini Noodles (Kids love it too!)

1 lb chicken (I used the meat from a Costco roasted chicken that we happened to have.)
2 TB minced garlic
1-2 red bell peppers
1-2 eggs (depending on how much you like egg in your pad thai. We used two)
1 bunch cilantro
2-4 large zucchini or 4-5 small
1/2 cup chopped peanuts (optional but de-lish)

I’ll show you the sauce recipe below.

Here’s how to do it:

Zucchini noodle pad thai that your whole family will love!


  1. Put some sesame oil into your skillet and cook the spiralized noodles until they’re soft.
  2. Remove the noodles and put them in a strainer with some paper towels. Make sure the liquid gets strained off.
  3. Add the garlic and red pepper, and 1/4 of the chopped cilantro. Sauté until tender.
  4. Turn up the heat a little and add the eggs.
  5. Add the noodles back. Cook for about 2 minutes.
  6. Add HALF the sauce and cook until bubbly. If you need more sauce, add it until it’s the consistency you like.
    I ended up with too much sauce the first time, and adjusted the recipe here but I discovered something: I could add edemame noodles to the sauce and it soaked up the extra sauce and added incredible flavor and texture to the dish. So I learned something!
  7. Add more cilantro and some crushed peanuts. Stir together, heat through and serve!

Top with cilantro and peanuts if desired.

Pad Thai Sauce:

Pad Thai Sauce Recipe


1/4 cup each:

  1. rice vinegar
  2. fish sauce
  3. brown sugar
  4. soy sauce (we used gluten free)
  5. lime juice
  6. siracha (omit or use less if you want milder sauce)

I know I said that I love crock pots and Mexican food, but from now on, You can call me Dragon Lady.

Enjoy!
Heidi

Cauliflower Bacon Casserole

Alright. I’m taking a little, tiny break from my slow cooker today. If you have kids who don’t like cauliflower, I’m here to win them over to the right side. This recipe is a WINNER! I know this because every.single.one. of my kids went back for seconds and I didn’t have leftovers. Yeah. That’s how I know.

I’ve been replacing potatoes with cauliflower for the past several years, and it’s been a good change. So probably the bacon isn’t that good for us—but once in a while—okay. Nevermind. I eat bacon whenever I can. #truestory

Bacon cauliflower casserole that your kids will LOVE

Serves 8-10
INGREDIENTS:

3 chicken breasts, cubed and cooked
2 head of cauliflower (I had a little leftover but 1 head would have been too little.)
1 tablespoon diced garlic, or to taste
2 cups shredded cheddar cheese
2 cups shredded Monterey jack cheese
bacon pieces (as much as you like) but I did about a cup or so. That’s because I was eating it as I went.

Cheesy cauliflower casserole with BACON

DIRECTIONS

Preheat oven to 350 degrees

Cook cauliflower until tender. DO NOT OVERCOOK. I cook mine in very hot water for about 10 minutes. The trick here is to let the water drain off, so while you’re prepping the rest of the dish, set it in a colander to cool and drain.

While cauliflower is cooking, add cheeses, bacon and garlic to a big bowl.

Cook chicken.

Add cooked check to the bowl and mix well. Then, add the cooked cauliflower.
Cauliflower casserole


mixitup


Dump it into a greased glass 9×13 casserole pan. If you don’t have a glass dish, don’t sweat it.
Cover with foil and cook for about 25 minutes. You want it nice and steamy.

Cauliflower Bacon Casserole
I served ours with a delicious spinach salad. I chose to withhold bacon from the salad, but hey—do what you need to do!  If your kids are like mine, they will love this and so will your husband. It’s a crowd-pleaser!

Enjoy~
heidi

EASY Slow Cooked Chicken Chipotle Fajitas

You guys.

I wish my blog could send you a whiff of my kitchen right now. It’s amazing. If I didn’t know better, I would say my heritage is south of here because I’m a lover of all things Mexican. Give me a taco and I’m a happy girl. I also love my slow cooker. In fact, my love-affair with slow cooking is just north of sinful. 🙂 Anyway! This is my new go-to recipe for Mexinight over here. Not only is it totally de-lish, but it works fantabulously well in my beloved slow cooker.

So, if you like fajitas and you’re addicted to slowcooking like me, this might be the answer to all your food prayers.
You’re welcome.

A slow cooked version of an old standby: FAJITAS!

You’ll need

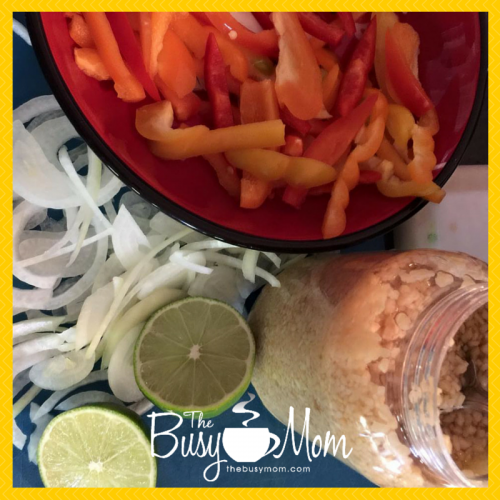
  • 2-3 chicken breasts
  • 3 bell peppers (I used one each of every color they had.)
  • 1 onion (I used yellow but white would be fab, too.)
  • 2 tbsp diced garlic
  • 1 lime
  • taco seasoning
  • chipotle peppers (If you like the chipotle part. Otherwise, omit them.)
  • toppings (cilantro, sour cream, etc)
  • corn tortillas

Slice the peppers into long, thin pieces. Put half into the slow cooker.

Slow cooked chipotle chicken fajitas

Add the half your onion and garlic.

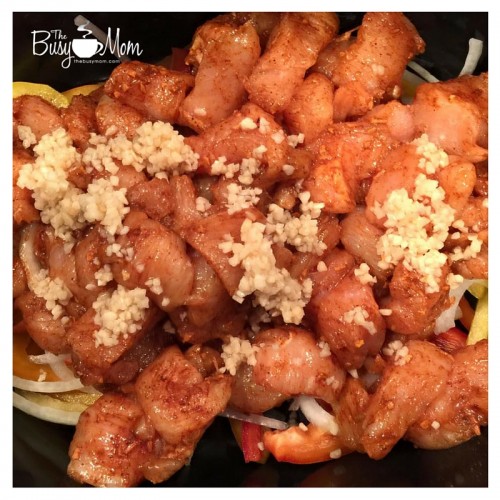
Dice chicken (I use Zaycon, and when I’m processing the chicken, I dice nearly 90% before freezing.) and place into a bowl. Put as much taco seasoning as you like. I’d say 1/8 cup would work.

Add the sauce from a small can of chipotle peppers. Stir to cover the chicken with the seasoning. You can add a few of the chipotle peppers, too, but I save mine for salsa.

Put the seasoned chicken in your slow cooker and cover it with as much garlic as you like. 🙂

easy slow cooked chipotle chicken fajitas

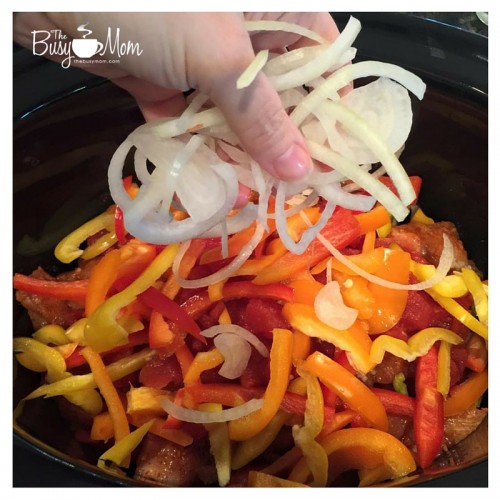
Add the rest of your peppers and onions.

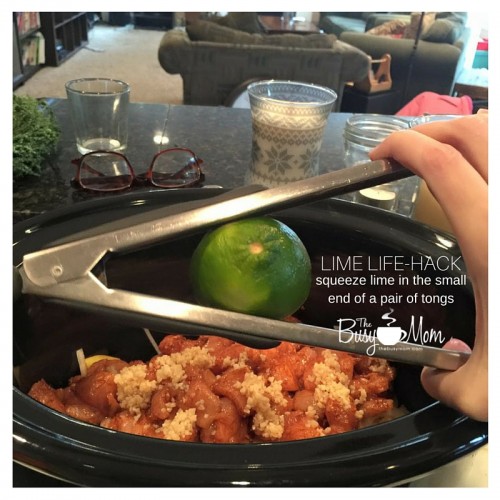
Squeeze half your lime out all over the chicken. Try to contain yourself. It will smell good by now.

Notice my little lime-squeezing trick? Yes. My 12 yr old taught this to me. #truestory

Life Hack: squeezing a lime

Cover the limey goodness with the rest of the peppers and onions

easy slow cooked chicken fajitas

JUICE THE OTHER HALF OF THE LIME NOW. Mmmmmm. Now we’re talking.

Cook on high for 3-4 hours or low for 5 hours.

Give it a good stir every two hours.

easy_title Slow cooked EASY chicken fajitas

Before serving, shred chicken and then dump the mixture into a colander to drain off any liquid. I save the liquid and use it in taco soup later. (Yum.)

Serve over warmed corn tortillas with any toppings that suit your fancy. Don’t forget the guac and Mexican music!

From our house to yours,
signature-heidistjohn


EASY Slow Cooked Chicken Chipotle Fajitas

EASY Slow Cooked Chicken Chipotle Fajitas

Ingredients

  • Chicken
  • 3 bell peppers (I used one each of every color they had.)
  • 1 onion (I used yellow but white would be fab, too.)
  • 2 tbsp diced garlic
  • 1 lime
  • taco seasoning
  • chipotle peppers (If you like the chipotle part. Otherwise, omit them.)
  • toppings (cilantro, sour cream, etc)
  • corn tortillas

Instructions

  1. Slice the peppers into long, thin pieces. Put half into the slow cooker. Add the first half your onion and garlic.
  2. Dice chicken (I use Zaycon, and when I'm processing the chicken, I dice nearly 90% before freezing.) and place into a bowl. Put as much taco seasoning as you like. I'd say 1/8 cup would work.
  3. Add the sauce from a small can of chipotle peppers. Stir to cover the chicken with the seasoning. You can add a few peppers, too, but I save mine for salsa.
  4. Put the seasoned chicken in your slow cooker and cover it with as much garlic as you like. 🙂
  5. Add the rest of your peppers and onions.
  6. Squeeze half your lime out all over the place.
  7. Cover the limey goodness with the rest of the peppers and onions.JUICE THE OTHER HALF OF THE LIME NOW. Mmmmmm. Now we're talking.
  8. Cook on high for 3-4 hours or low for 5 hours.
  9. Give it a good stir every two hours.
  10. Before serving, shred chicken and then dump the mixture into a colander to drain off any liquid. I save the liquid and use it in taco soup later. (Yum.)
  11. Serve over warmed corn tortillas with any toppings that suit your fancy. Don't forget the guac and Mexican music!
http://heidistjohn.com/blog/recipes/easy-slow-cooked-chicken-chipotle-fajitas

Learning to Trade: What’s Good for What’s Best

As the new calendar year and the second half of my homeschool year get underway, I’ve been thinking about what’s going well for my family and what might need to be changed. You may have heard this quote by Oswald Chambers:

In seeking the Best we soon find that our enemy is our good things, not our bad.  The things that keep us back from God’s best are not sin and imperfection, but the things that are right and good and noble from the natural standpoint…Very few of us debate with the sordid and evil and wrong, but we do debate with the good.

trading-good-for-best

It’s so easy to look at other moms and think they have everything together. Their houses are always clean, their clothes are always washed (and folded, and put away!), their children always behave, and their kids’ school work always gets done and done well. But that’s not the truth!

Years ago, my husband and I built our house. Because of some unavoidable delays, our construction began in August of that year. On top of that, our contractor became very sick and wasn’t able to do his job, so the job of contracting fell to me. The months from August through December (when we moved into our house) were ridiculously busy!

We did what little school we could do during the construction of our house, but the main part of our school year happened after we moved in. That meant we did the bulk of our homeschooling from January through May that year. I somehow made it through the school year, but the following summer, everything fell apart.

I began suffering from depression and anxiety attacks.  I couldn’t sleep and was extremely tired all the time.  I think all of the stress I had been under from August to May (when I couldn’t allow myself to “break down” because I was too busy) finally caught up with me.  Even though I had finally been able to build and move into the home I’d been looking forward to for many years, I felt overwhelmed and anxious and sad. It took months and months to begin to feel like my “normal” self again.

We moms, and especially homeschooling moms, have a tendency to try to do it all!  As the quote above states, we let the business of “doing what’s good” get in the way of God’s best for us.  It’s not that we are tempted to do bad things.  We willingly avoid doing bad things.  Many times, though, we try to do too many “good” things.  I caused myself months of pain because I was trying to do too many good things.

I decided before the summer began that I was going to take the entire summer off to rest (as much as a mom can) and clear my calendar of any commitments at all.  I knew I absolutely had to have some time to slow down and not do so many things, even if they were good, so that I could get recharged before the next homeschool year began.

It turned out to be a wonderful summer.  I really did keep my commitment to only those things that HAD to be done–like grocery shopping and house cleaning.  We didn’t do lots of play dates or extra-curricular activities or much of anything else except church.  Even at church I didn’t commit to teaching any classes or planning anything.  I felt terrible about suddenly giving up most of my leadership positions, but looking back, it was the right thing to do for a time.

As the new year gets underway, I’m keeping in mind that I need to be sure doing what’s  good doesn’t get in the way of doing what’s best.

My house is not always clean, and the dishes aren’t always done.  Sometimes the school work must even wait until another day.  God is speaking to me, though, and letting me know that it’s all ok.  My main “job” right now is loving and caring for my husband and my children.

The next time you begin to feel stressed and worried and anxious, stop and ask yourself not if you are doing bad things, but if you might be doing too many good things.  Then pray and ask God to show you which good things you should lay down and which ones you should continue doing.  It may be that you are going to too many homeschool play days, activities, or classes.  It may be that you are trying to keep the house spotlessly clean.  It may be that you have too many leadership positions at church or somewhere else.  God can and will show you which things you really should be doing and which ones you really shouldn’t be doing if you will allow Him to do so.  Then, you will be in a position to receive God’s best for your family. And that’s a very good thing!

How to Clean a Child’s Bedroom Without Losing Your Mind

The never ending chore of keeping the bedrooms clean can cause a fair amount of tension if we choose to let it.  I’m not a mother who requires that bedrooms get picked up every day, because imaginary play often goes on from one day to the next, and I hate to squelch it.  That said, there are plenty of things that can be handled consistently to help keep a bedroom under control.  But eventually, it all needs to get cleaned up so we can vacuum or sweep… at least once or twice a year!  :blushing:  This task can be overwhelming for a child, and we need to be understanding about that.  Considering the number of decisions required to put away 9,743 objects in an hour, we should have some compassion.  Here are a few tips to help it be a manageable – and hopefully successful – task!

clean-childs-bedroom

  1. Make it clean-able.  Sometimes there’s just too much stuff to even be able to have it put away.  Maybe it’s a small bedroom or there aren’t enough places to put things.  Fix that!  Declutter, pass on some toys, buy storage solutions, etc.  A room full of things with no place to belong will be a constant frustration for you and your child.
  2. Have one container for “all the little things that feel like they should get thrown away but your child sees value in them.”  Yeah. Those things that you want to pitch while they’re not watching?  Chances are good that they’ll notice. (Ask me how I know.)  We use an under-bed container for these things: random flashlight, receipt, Chick Fil A toy, etc.  Anything that isn’t a group deserving of its own storage goes in this miscellaneous container, and it’s so appropriate to tuck it under the bed! Most of this stuff lives on the floor, so it’s really easy to put it away here.  🙂
  3. Pick up everything and put it in one pile.  This is hands down, my best tip.  Pick up everything – EveRYthInG – and put it into one pile. On the bed, center of the floor, or wherever you choose. (We choose center of the floor because we can sweep it there easily!)  It automatically eliminates the visual clutter that can be overwhelming to children, especially younger ones.
  4. After everything is in one pile, we pull stuff from that pile in categories.  (Make a list of the order in which you suggest they do things if you are teaching them to do this independently.) Shoes are easy to start with because they usually all go in the same place, so it’s easy and quick success.  Clothes next because they are a big part of the pile.  Then the pile is usually manageable after those two categories. After that, just take one item at a time.
  5. Don’t rant while they’re cleaning or you’re cleaning with them.  (How would I know this is a temptation?)  It will make only serve to make the experience miserable for you both and make them feel like a failure.  Turn on some music to keep the mood light if you need some help. 🙂
  6. Be willing to help while they clean.  This may look like picking up and putting away while they work alongside you.  Maybe it’s in the form of company and reading aloud while they work.  Maybe it’s frequent checking in and encouraging.  There are a lot of ways to help, and the younger the child is, the more involved you will likely need to be.  But regardless of the age of the child, encouragement will go a long way!

You can do this, Busy Mom!

Do you have tips to share that simplify this task at your house?

Resolution or Inspiration?

How many January 1st’s have you begun with a list of resolutions?

  • Lose weight
  • Exercise more
  • Read the Bible regularly
  • Get organized
  • Keep in touch better
  • Volunteer
 And the list goes on and on.
Those visits to the gym last a few weeks, one or two closets get cleaned out, that new devotional is read daily for awhile, you might even have lunch with that friend you haven’t seen in 2 years.  But by March, the resolutions have gone by the wayside and life is back to “normal.” It’s ok, you can start again next January 1, right?
 Resolution or Inspiration

There’s a reason New Year’s resolutions don’t work.  Resolutions don’t inspire. They begin with things to “do” instead of inspiring you to want to “become” something different.

Why do you want to lose weight? Perhaps to become more confident.

Why do you want to declutter your house? Maybe to feel more peaceful.

Why do you want to volunteer? Probably because you desire to become more generous.

The resolutions are more about the end results . . . who we become . . .but the focus is so much on what we need to do, that we lose the inspiration to succeed. We get discouraged because we stopped going to the gym, missed a few days of the devotion, or ate a piece of pie.  We failed.

So what would happen if instead of choosing things to “do” differently, we chose to “become” different in some way.  Not completely different.  We are fearfully and wonderfully made. But chances are, if you have a lot of New Year’s resolutions rolling around in your head, then you probably have something about yourself that you’d like to be different. And who doesn’t have something that could use a little tweaking?

This year, instead of making that fateful list, try choosing a word that reflects the changes you need to make in your life. Find a word that you believe will inspire you to work toward becoming, not just doing. Search Scripture for your word. Keep it in your mind, post it around your house where you’ll see it every day, contemplate it. Ponder.  Let your word guide you into action.

Don’t make resolutions you know you won’t keep. Be inspired this New Year.

Do not conform any longer to the pattern of this world, but be transformed by the renewing of your mind. Then you will be able to test and approve what God’s will is–his good, pleasing and perfect will. ~Romans 12:2

For more inspiration about choosing a word for you year, take a look at the book, My One Word: Change Your Life with Just One Word by Mike Ashcraft and Rachel Olsen.

My One Word

Have you chosen a word in the past? How did it change you or guide your decision making?  What will you choose for 2016?