Tag Archives: side dish

Chipotle Salsa!

Best.Salsa.Ever.

So … I am a HUGE salsa fan. I like it HOT. (Can you imagine?)

I started making salsa years ago and when I started I did things the “purist” way … even fire-roasted tomatoes! Well, several children later, I’ve graduated to canned tomatoes and I have to say that they taste every bit as good because all the other ingredients really “make” the salsa!

Here’s my recipe for my favorite salsa, and a few tips for those of you with more “mild” tastes:

  1. If you don’t like SPICY salsa, you can cut down on the heat by taking out the seeds in the jalapenos and all the white membrane that holds the seeds. **word to the wise** Be careful with jalapenos! I’m here to tell ya, I made the mistake one time of taking out my contacts with jalepeno still on my hands.  It.Wasn’t.Pleasant.  WASH YOUR HANDS THOROUGHLY after handling jalapeno peppers.
  2. Chipotle peppers are just smoked jalapeno peppers in yummy sauce. They can be hot. If you want a more mild recipe, simply cut the amount of chipotle pepper but don’t cut it out entirely. That yummy smoked flavor is AMAZING in salsa.
  3. Use fresh ground pepper if you can. It’s the best. 🙂

So without further adieu, here’s my secret recipe! Enjoy!

1 large white onion
1 red pepper
2 cans diced tomatoes – drained
3 jalapenos – seed them to remove the “heat” (I like mine HOT)
4 cloves of garlic
1 bunch of cilantro (yes the whole bunch)
1 or 2 canned chipotle peppers
2 tsp liquid smoke
1 T white vinegar
1 T lemon juice
salt & pepper to taste

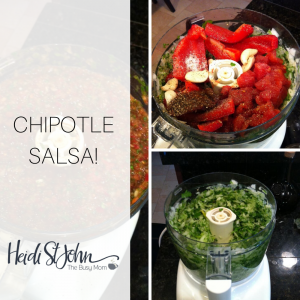
Add these to your food processor and blend FIRST.

  • Onion
  • Cilantro
  • Jalapeno

Adding these first helps keep the tomatoes from becoming “soupy”

Add the tomatoes last and pulse your food processor. The trick is to get it the consistency that you like it. It might take a few tries but keep at it. It’s worth it!

After you have blended those, add your liquid smoke (Optional if you don’t have it. Don’t run out to the store, just buy it for next time.), vinegar, lemon juice, garlic, red pepper & chipotle pepper.

Blend. Add the drained cans of diced tomatoes LAST. Taste for salt and pepper. Remember to PULSE your food processor. You want salsa, not soup. 🙂

This will make a whole lotta salsa! Enough to feed a crowd. Maybe it’s time to have some friends over… !

Enjoy!
Heidi

Cream Cheese Chicken Tenders And Green Bean Tomato Medley

Last night I needed a super simple, healthy, gluten free meal that was quick to prepare. We were just coming down from the high time demands after talent show week for our kids. Since I direct the choir, and work with small ensembles, this kept me running with extra practices, along with other extras thrown in each day of the week. Consequently, time for planning and preparing meals was pretty much non-existent. Time didn’t allow for a trip to the store, so I began searching our cupboards, freezer, and refrigerator, and gathered some ingredients that seemed like they would compliment each other. In other words, I totally winged it! This was a cooking experience on the fly, so when my family decided they love it and want me to make it again, it was a pleasant surprise. If you need a meal that meats this criteria, you just might like this one.

gf-chicken-green-bean

Cream Cheese Chicken Tenders

Ingredients

  • Chicken Tenders (as many as your family will eat)
  • 1 tbsp. coconut oil
  • Salt (Pink Himalayan salt is the best)
  • Fresh, ground, pepper
  • garlic powder
  • Organic No Salt Seasoning (Costco)
  • Cream cheese to taste

Directions

  • In a large skillet, heat coconut oil, and add chicken tenders
  • Season the chicken with salt, pepper, garlic powder, and no salt seasoning.
  • When the first side is browned, flip the tenders to brown the second side, and cover.
  • Cook until chicken is no longer pink in the middle.
  • Add cream cheese and stir well.

Serve and enjoy!


Green Bean Tomato Medley

Ingredients

  • Frozen or fresh green beans
  • One medium onion
  • One clove garlic, minced
  • Salt (pink)
  • Fresh ground pepper
  • One tablespoon coconut oil
  • Grape or Cherry tomatoes to taste

Directions

  • In a medium to large size skillet, heat coconut oil
  • Add chopped onion, garlic, and seasonings and sauté until translucent.
  • Add green beans, stir well, and cover.
  • Cook thoroughly for about fifteen minutes, stirring from time to time, until beans are tender, but not overly soft (for frozen beans. Less for fresh).
  • Add a handful or two of grape or cherry tomatoes and cook for a few more minutes to warm them.

Serve hot and enjoy a delicious, hot, healthy, gluten free meal with your family! <3

Cauliflower Bacon Casserole

Alright. I’m taking a little, tiny break from my slow cooker today. If you have kids who don’t like cauliflower, I’m here to win them over to the right side. This recipe is a WINNER! I know this because every.single.one. of my kids went back for seconds and I didn’t have leftovers. Yeah. That’s how I know.

I’ve been replacing potatoes with cauliflower for the past several years, and it’s been a good change. So probably the bacon isn’t that good for us—but once in a while—okay. Nevermind. I eat bacon whenever I can. #truestory

Bacon cauliflower casserole that your kids will LOVE

Serves 8-10
INGREDIENTS:

3 chicken breasts, cubed and cooked
2 head of cauliflower (I had a little leftover but 1 head would have been too little.)
1 tablespoon diced garlic, or to taste
2 cups shredded cheddar cheese
2 cups shredded Monterey jack cheese
bacon pieces (as much as you like) but I did about a cup or so. That’s because I was eating it as I went.

Cheesy cauliflower casserole with BACON

DIRECTIONS

Preheat oven to 350 degrees

Cook cauliflower until tender. DO NOT OVERCOOK. I cook mine in very hot water for about 10 minutes. The trick here is to let the water drain off, so while you’re prepping the rest of the dish, set it in a colander to cool and drain.

While cauliflower is cooking, add cheeses, bacon and garlic to a big bowl.

Cook chicken.

Add cooked check to the bowl and mix well. Then, add the cooked cauliflower.
Cauliflower casserole


mixitup


Dump it into a greased glass 9×13 casserole pan. If you don’t have a glass dish, don’t sweat it.
Cover with foil and cook for about 25 minutes. You want it nice and steamy.

Cauliflower Bacon Casserole
I served ours with a delicious spinach salad. I chose to withhold bacon from the salad, but hey—do what you need to do!  If your kids are like mine, they will love this and so will your husband. It’s a crowd-pleaser!

Enjoy~
heidi

Cheesy Bacon Potatoes

Loaded Mashed Potatoes

I recently received a review copy of the Gooseberry Patch Hometown Christmas cookbook. As always, I was excited to flip through it and read the recipes, tips, and stories. Yes, I love those books!

I was especially excited to see their recipe for “cheese and bacon party potatoes.”  I have made something similar for a while, but my recipe looked something like this: potatoes + some butter + milk until it’s just right. Season with “enough” salt and pepper.  Then add a couple handfuls (or a generous shake of the bag) of shredded cheese and some bacon. Anyone else cook like this??  It works, but it’s not so great for sharing!

However, the similar Gooseberry Patch recipe included some helpful measurements so I was able to use it for a guideline to share my dish with you.

These are fantastic, and easy enough for an everyday family dinner, but they’re also great for pot-lucks and holiday gatherings. I took them to a church fellowship meal recently and brought home a scraped-clean dish.

What you need:

4 c. mashed potatoes
1/2 cup milk
1/4 cup butter, softened
1 1/2 cup shredded cheddar cheese (I used a mix of cheddar and colby-jack, I liked to mix things up!)–Divided
1/2 lb bacon crisply cooked (divided)
1/2 tsp. salt
1/4 tsp. pepper
1/4 c. green onions/chives

What to do:

1. Combine all ingredients, reserving some shredded cheese and bacon, to sprinkle on top. Mix well. I use a hand mixer for this, it’s one of only 2 things I use a mixer for. (the other is meringue, in case you’re wondering).

2. Spread into a greased 3 qt. casserole dish. Sprinkle the top with bacon and cheese.

3. Bake at 350 for 30-40 minutes, until cheese is melted and the top is golden.

Note: You could also use sour cream or whipping cream in place of the milk for a slight variation.

Yummy!!!

Spicy Baked Zucchini Chips {yum}

Looking for a healthy snack that your kids will love?  Give this a try.  I set them out and our kids ate them up in no time flat. They’re baked and oh-so-delicious!

I’ve seen several versions and tried a few in years past, but this time, I added spice for that extra “kick” and it made all the difference for this spice-loving family.

Zucchini chip ingredients

I used Penzey’s “Northwoods Fire” for it’s smoky flavor but chipotle would be great, too.  I’ll try that next time with some garlic salt.  By the way, this is a perfect recipe for your kids to practice their culinary skills.

zucchini2

Serve with your favorite marinara sauce.  I used pizza sauce for this one—it was a hit!

zucchini3


Here’s the skinny on these yummy treats:

Ingredients

  • 1 large zucchini
  • 1/2 cup shredded parmesan cheese
  • 1 1/2 cups Panko (Japanese style bread crumbs) … bake up crispier than regular bread crumbs
  • 1 1/2 tsp your favorite spicy seasoning (I used Northwoods Fire from Penzeys)
  • 1 tsp garlic powder
  • 1 tsp onion powder
  • 2 tsp paprika
  • 3 eggs

Directions

  1. Preheat oven to 425 degrees
  2. Slice zucchini
  3. Combine parmesan cheese, panko, and spices in medium sized bowl
  4. Mix egg whites in small bowl
  5. Dip zucchini in egg white
  6. Coat each piece with cheese mixture
  7. Bake for 35-40 minutes or until crispy
  8. Serve with your favorite marinara

I’ve used a lot of versions of this recipe, but my favorite so far is from my friend Toni! at The Happy Housewife. This recipe inspired by and adapted from her.  Check out Happy’s version here.

Enjoy!