Tag Archives: sweet

Christmas Spritz Cookies

Spritz Cookies TBM

This is my husband’s favorite Christmas cookie recipe.  It was passed down from his mom and we have enjoyed them every year for the last 25 years that we have been married! I was looking forward to sharing it with you..and, well, things didn’t go as planned.

I needed to make the recipe so that I would have images for this post.  Now let me just say that EVERY year we have put this dough through a cookie press.  See??

Cookie Press

This lovely tool makes beautiful little shapes…like the ones you see in the picture.  One problem:  It’s missing the part that seals off the end which renders it completely ineffective.  I spent 30 minutes looking for it, only to find myself distracted by how messy my cupboards are.  Where is the part you ask?  Your guess is as good as mine.  Probably the same place as my missing garlic press and the potato peeler my husband bought for me from a very expensive kitchen store.  Actually, I could probably tell you who took off with it…”not me.”  “Not me” has committed many crimes in our house over the years and when I find “not me,” I’m pretty sure it’s going to get ugly.

Fortunately this recipe comes with a “Plan B.”  Really, don’t most of us moms live in “Plan B” (Or C or D or F)?  The dough can be chilled for a bit, rolled out and you can use cookie cutters to cut the shapes.  So here’s the recipe:

Christmas cookies with Alahna's hand

Spritz Cookies:

Mix these together with a mixer:

1 c. butter, softened

1 c. sugar

3 eggs

1 1/2 t. vanilla

In a sifter, sift into a separate bowl:

3 1/2 c. flour

1 t. baking powder

2 t. cream of tartar

Gradually stir dry mixture into wet mixture.  Chill for an hour if rolling out for cut out cookies.  Then roll out 1/4 in. thick.  If using a cookie press, (WAHHH!!!) there is no need to chill. (But I should probably think about chilling myself).  Add any pretty sprinkles or colored sugar you may want to the tops.

Christmas cookies finished

Bake at 425 degrees for 6-7 minutes.  Watch closely as smaller cookies may bake faster.  May YOUR baking days be merry and bright and may all of your kitchen tools be easily found.

signature_durenda


Quick and Easy Delicious Donuts

Great treat for family night or a weekend breakfast--quick and easy delicious donuts!


Our family is on a real food journey. This means that most of what we eat is made from real, whole, quality ingredients and not chemical-laden, processed foods.

However, there are still a few things that just scream comfort, and this is one of those things.

In our family, Fridays are “fun night.” We have something fun for supper and watch a family-friendly show or movie. Sometimes we make something extra fun for dessert like these donuts. “Real” donuts have their place and I love those too, but there is just something special about these biscuit donuts.

If you haven’t tried them, you are in for a real treat!

Quick & Easy Biscuit Donuts

What you need:

  • 1 Can of regular canned biscuits (10 ct)
  • Granulated sugar
  • Oil (for frying)
  • Deep Fryer (worth the investment for the ease, but not required)

What to do:

  1. Preheat oil to 350 degrees. (if you’re using a regular skillet, just fill skillet with 2 inches of oil and heat on med-high heat.
  2. Open biscuits and remove from can. Form biscuits into shapes. For “donuts,” I simply use the round end of a wooden spoon to poke a hole in the middle and then work it a bit to widen the hole. For the “holes,” I simply tear a biscuit into 3-4 pieces and roll them into loose balls.
  3. Once you have your donuts and holes ready, and the oil is thoroughly heated, you’re ready to fry them. Gently place donuts in hot oil (be careful!), cooking them on each side for about 2 minutes, until browned.
  4. Remove cooked donuts and drain onto paper towels, then toss with sugar to coat. We just use plain sugar, but you can also add in cinnamon, use powdered sugar, or make a quick glaze (1 cup powdered sugar + 2 tbsp milk + 1 tsp vanilla).

Enjoy!

signature_crystal

Chocolate Applesauce Muffins

Chocolate Applesauce Muffins

Earlier this year, our husband gave ourselves a challenge to eat real food only throughout the period of Lent (and hopefully beyond!) We are fed up with the impact that our diets have on our family and health. I was tired of the junk food marketing to kids, and tired of my own disordered eating and food addiction.

So, we decided to do away with processed foods and eat real food only. We’ve had some slip ups during that time, but overall it has been such a wonderful change for our family.

We didn’t cut out sugars, but we limit them and stick to natural ones, which we consider to be maple syrup and honey. This was especially fun since we harvested and cooked our own maple syrup this year!

Anyway, so I have been modifying recipes left and right to accommodate our new eating standards and thought I’d share this one with you today. Don’t let the “real food” or “healthy” labels fool you–these are delicious! They are light, and sweet, but not too sweet.

Chocolate Applesauce Muffins

What you need:

  • 1/2 cup butter
  • 1/2 cup maple syrup
  • 2 eggs
  • 1/2 cup cocoa
  • 1 1/2 cup unsweetened applesauce
  • 1 3/4 cup whole wheat flour (I use white whole wheat)
  • 1 tsp baking soda
  • 1 tsp baking powder
  • 1/2 tsp salt

What to do:

  1. Preheat oven to 325 degrees.
  2. In a small bowl, combine flour, baking soda, baking powder, and salt. Set aside.
  3. In a large mixing bowl, cream butter and maple syrup. Add eggs and beat well. Add cocoa and mix well. Fold in applesauce.
  4. Add dry ingredients to wet mixture and stir until just combined.
  5. Spoon batter into muffin tins and bake at 325 degrees for 25-28 minutes.

Enjoy!

signature_crystal

Easter Dinner Menu Plan

For generations, food has been an important part of celebrations and traditions.   There is a comfort in eating certain foods on certain days, cooked the same way you always remember.   You probably have your favorite birthday cake or dessert, Christmas meal and cookies, and other special foods for special days.  I used to think that it wasn’t THAT big of a deal, especially when the kids were little. It sometimes felt like SO much work to make the effort.  And there ARE times to exchange the tradition for something less stressful if it keeps the heart of the celebration from being lost. I remember we traded our traditional home made Thanksgiving feast for one bought at Safeway because I had just had our fifth child.  I was really thankful for that store bought meal, but the next year, we appreciated the home made one even more!  And the older our kids get, the more they more they look forward to these traditions.

That being said, I want to share one of our favorite (and easiest) Easter and Christmas meals.  We love this one because things can be made ahead of time which comes in handy especially on these particular holidays.

So here is the menu:  Spiral sliced ham, Gen’s Potatoes, Grandma’s Crescent Rolls, Curried Fruit and steamed Green Beans.

A day or two before the holiday:

Grandma Gen’s Potatoes

Prepare a buttered 9×13 pan

10 medium potatoes, cooked and mashed (don’t add liquid to them)

Add and beat til fluffy:

1 pkg cream cheese

8 oz sour cream

1 package Ranch mix(this works the best) OR 1 t. garlic powder

salt to taste

Place mixture in 9×13 and add 1/2 c melted butter(you can use less, it just might not have quite the crisp on top) and sprinkle with paprika

At this point, you can cover (when it cools a bit) and place in the refrigerator for 1-2 days ahead of time!

Bake at 350 degrees for approximately 45  minutes, if refrigerated or 30 minutes if baking immediately.  Edges should be lightly browned.

Durenda Wilson Busy Mom

Grandma’s Crescent Rolls

Dissolve one package of dry yeast in one cup water

Melt one cube of butter

In mixing bowl beat three eggs.  Add 1/2 c sugar and 1 t. salt

Add yeast mixture

Add melted butter

Add 4 1/2 c. of all purpose flour (or half wheat/half white flour)

Store in air tight container until ready to roll out.  Roll out in 2 circles.  Cut each into 12 pie-shaped pieces.  Roll into crescents.

Place on greased cookie sheets.   If you want to go ahead and bake them, let rise 2 hours or until doubled.   Or at this point you can freeze them. Then you can just let them rise on the counter overnight and bake them in the morning. Bake 10-12 minutes at 350 degrees.

crescent rolls TBM wm

Day of:

The Spiral ham we buy from Costco ( a no brainer)-this goes in the oven for about 1 1/2 hours. (Don’t forget to put your potatoes in about 30-45 minutes after the ham goes in)

Curried Fruit–this goes amazingly well with the ham and potatoes.  Not something I would have put together, but my husband’s mom has made this meal for years and it’s always a big hit.

In a 9×13 pan (OR large saucepan on the stove if you are low on oven space) place:

1 can of peaches (half drained)

1 can of pears (half drained)

1 can pineapple (half drained)

Melt 1/3 c butter, 1/3 c brown sugar and stir in 1 t. curry powder and pour over the fruit.  Bake until heated through.

Green Beans I find the best and freshest from Costco as well.  You can use frozen, but they aren’t quite as tasty.  I usually steam them for about 4-5 minutes so they aren’t completely limp.  Then add a couple Tablespoons of butter and salt to taste.  Sometimes we throw some real bacon bit in for extra flavor.  The taste goes well with the ham.  Make this in the last few minutes before dinner.

We hope your family enjoys this meal as much as we do!  Happy Easter!  He has risen!  He has risen indeed!


Preparing for Christmas Morning the Day Before {Gluten Free Cinnamon Streusal Muffin Recipe}

Preparing for Christmas morning breakfast the day before!  Tips and a Gluten/Dairy Free recipe from The Busy Mom.

Christmas morning is such a busy time.  I always feel pulled towards both wanting to make a special breakfast for the family, but not wanting to miss out on special memories in the making.   I don’t want to spend most of my time slaving away in the kitchen.

Our family’s solution is to pre-make and pre-mix as much as we can the day before.  Muffins are a tried and true favorite.  The day before I’ll mix the dry ingredients together as well as the wet ones.  Then the following morning I simply mix them together and pop them in the oven.  Voila!  We have fresh-baked goodies and I don’t miss out on precious time with my family.

My last baby struggled with a whole slew of food allergies and sensitivities.  During her first Christmas, my diet was severely limited as a breastfeeding mama.  I was new to the whole food allergy thing and didn’t have the time or energy to think about making something special for myself.  My goal was to make sure that the rest of my family was happy.  My sister gave me the most beautiful Christmas morning surprise when she baked these yummy gluten, dairy free muffins.  I savored each and every bite.   While God healed my baby girl this summer from 7 of her 8 food allergies, she still has to be dairy free.  With another family member reacting to gluten, I’ll be pulling out this beautiful gift of a recipe that she gave me and making these special muffins again this Christmas.

For those of you with food allergies, here’s a delicious option. {Note, there are pecans in the struessal topping, but they could probably be omitted if there is a nut allergy.}

Cinnamon Streusel Muffins {Gluten and Dairy Free}

Topping
1/2 cup packed brown sugar
1/2 cup finely chopped pecans
1/4 cup brown rice flour
1 tsp ground cinnamon
1 tsp grated lemon zest
2 TBS Earth Balance Dairy Free buttery spread or Coconut Oil, melted

Liquid Ingredients
2 large eggs
2/3 cup milk of choice {we use rice or almond milk}
1/2 cup extra virgin olive oil
1 teaspoon vanilla

Dry Ingredients
1/2 c brown rice flour
1/2 c oat flour
1/2 cup almond flour
3/4 c sugar
3/4 cup potato or tapioca starch
1 Tablespoon baking powder
1.5 teaspoon guar gum {or xanthan gum}
1 teaspoon ground cinnamon
1 teaspoon salt

The day before:

Mix dry ingredients, cover and set aside.  Mix streusal topping, cover and set aside. Add liquid ingredients together in a dish, cover and put in fridge.

Christmas morning:

Preheat oven to 375 degrees.  Grease muffin tins or line with paper cups. Mix liquid ingredients well, about 1 minute.  Add in dry ingredients and mix until blended.  Pour a spoonful into 12 muffin cups.  Add a small spoonful of the streusal to each cup.  Finish filling each of the 12 cups with the rest of the batter.  Top them with the crumb topping, gently pressing the topping into the batter.  Bake for 20-25 minutes.  Cool the muffins for 10 minutes before removing from the muffin tins.  Transfer to a wire rack and allow them to cool for another 5 minutes.

Tips for Parenting Food Allergic Kids {Holiday Meal Ideas}

thanksgivingallergytips

If your kids have food allergies like mine do, you know the frustration of large get togethers that center around food. It’s just hard. Nothing replaces the feeling of being left out, especially when that is part of every holiday memory you have.  Thankfully kids get focused on playing, but there is inevitably time at the table, and that’s hard! Other than skipping the mealtime altogether (which my kids don’t want to do when given the choice), we resolve do the best we can. Honestly, it’s a lot of work for me, but it is always worth it when I see my kids’ plates licked clean of their favorite foods.

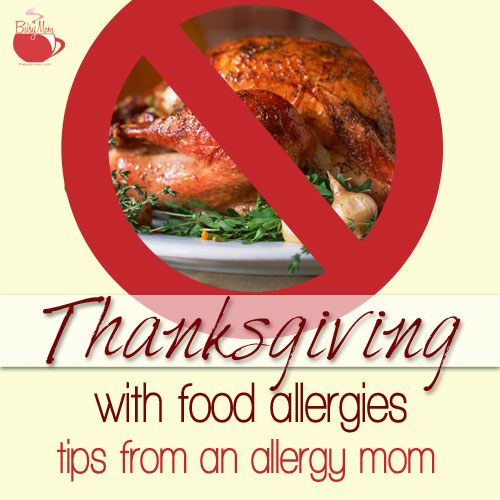
I thought I’d share how I do our traditional Thanksgiving meal free of the eight major allergens and corn. Keep in mind, it’s not made to be full of gourmet recipes, but alternatives to the main family meal (because we get together with many other people who cook) that are still delicious but simple to do… a way to include everyone without making an entirely different meal.

EveRy food allergy family has different needs, so find what works here and leave the rest. Use your safe something and make something else work. You know food allergy mamas are the queens of modifying! I’ve been unspecific on purpose, because we all have our own spreads, margarines, oils, amounts etc that work for our specific needs. I’m just sharing how we think out of the box. And I have no photos because I can’t wait until next Thursday to take them all so I can share them with you!

Turkey
I get fresh turkey legs or thighs from the butcher at my higher end grocery store, put them in the crock pot with at least 1 cup of broth or water (more if I want to make gravy), and set them to cook on high for a few hours(less than 4 hours for 4 legs) … I just watch to see when it’s done.*
*I buy meat with no ingredient list, which means nothing has been injected into it. The injected solutions are not corn or other allergy friendly.

Gravy
I keep things pretty simple in the kitchen, as you’ll notice as this post goes on. I have no idea how everyone else makes gravy or what they do to complicate it, but I’m the hired gravy-maker now for our family gatherings, and people keep going back for more.  I take the broth leftover from the crock pot (fat included), bring it to a boil (high heat) in a skillet. Turn down to medium-low, and add brown rice flour, whisking consistently (though not necessarily non-stop) as it boils. Keep whisking and simmer for 2-3 minutes while it thickens, repeating this step until it’s as thick as you like it. Salt to taste.

Sweet Potatoes
Sweet potatoes are a tough thing since so many sweet potato casserole recipes our kiddos will see are covered with marshmallows and loaded with sugar, milk and eggs. What I do now is bake sweet potatoes in their peel (poke with a fork, bake at 425 until they’re soft), peel them, place in small casserole dish, mash lightly with a fork, stir in some liquid (safe milk alternative or chicken broth), add margarine (or your safe spread), then top with brown sugar and cinnamon. It’s okay if they’re loaded with sugar… everyone else’s recipes are too!

Dressing… or is it stuffing?
Either way, I got nothin’ for ya’ because we don’t like it, so I’ve never tried to replace it! (Post a comment if you have a recipe to share.)

Mashed Potatoes
We make our mashed potatoes with chicken broth instead of milk, and safe margarine or oil instead of butter. The chicken broth adds so much flavor, we prefer them over those made with milk and butter now!
Or go really easy (no one will tell your mother) and use these instant flakes! Potatoes only!

Something Green
Ummm, do they really have to eat something green?  I suppose to be helpful I’ll add that steamed veggies with a holiday-amount of your favorite spread are permissable. My kids love salad, so when I require them to eat something green at a holiday meal (really, never) I give them that, and it’s really easy to make match for every guest who will attend.

Rolls
Sometimes I make safe rolls, depending on how well I’m doing on getting everything else done… usually that’s not very well, so most years the kids have had toast (on their safe bread), warmed and slathered with their margarine (or whatever you prefer) and honey. If I get my act together a few days early, I make the safe dough or rolls and freeze them to easily bake or thaw Thanksgiving morning. (For gluten free “rolls,” I make the same dough I use for bread and bake it in muffin tins.) Cranberry muffins made safely are perfect too.*
*In quick breads or muffins, I use familiar wheat recipes and sub brown rice flour cup for cup with excellent results. And I use 1T flax meal stirred into 3T warm water for each egg I need to substitute. These make for easy allergy free baking and avail a lot of options!

Dessert
I’ll admit, I’ve tried and failed at a number of allergy friendly pie recipes. The dairy-corn-wheat-egg free pumpkin pie was gross and the dairy-corn-wheat-egg free pecan pie (we’re obviously not nut free around here!) was very runny, though still delicious. I’ve settled on a good old modified apple crisp.  Smells like fall as it bakes, and can be loaded with doubled topping for extra holiday fun! Oatmeal raisin cookies are my most successful allergy free cookie recipe, and can be pre-made, frozen and then warmed just in time for dessert too!

Allergy Free Apple Crisp

6 medium tart apples, sliced and peeled
2 1/4 cups turbinado, raw or brown sugar
1 1/2 cups brown rice flour
1 1/2 cups oats (gluten free if you need that)
1/3 cup oil (just enough to coat the topping when stirred)
2 1/4 teaspoon cinnamon
2 1/4 teaspoon nutmeg

Arrange sliced apples in pan. Mix all other ingredients and sprinkle over apple layer.
Bake at 375 for about 30 minutes, or until topping is lightly browned.

Drinks
This might seem like a silly one, but to a corn allergy child, prepared drink options are severely limited. I make sweet tea beforehand to make sure he has something he loves.

A few other tips:
Feed them a snack before you arrive or before the meal.  If they’re not starving, their eyes and stomach will be much more satisfied with what they can have instead of what they can’t have.
Fix their plate for them (before you call them to the table) so they don’t have to walk through the line and see what everyone else might be having.
If dessert isn’t an organized event, don’t feel the need to call them when everyone else comes. Leave them playing and feed them their dessert whenever they come looking.
As silly as it sounds, fun holiday paper plates & cups or beautiful china makes a different meal really exciting too… it takes the focus off the food!
Create “matching” food only for the things they like. One year I went to great effort to make a safe green bean casserole… only to be reminded how much my son hates green beans. Now I just “match” the foods I know my kids love. They have a plate full of their favorite foods, and are very happy to not have to eat broccoli! (I avoid any and all food battles on holidays as a gift to my food-allergy-mama self. I encourage you to do the same!)

Most importantly, don’t encourage (or allow) a “poor me” attitude about their allergies. They are tough, for real, but some people can’t run, or hear, or even swallow. Help your children keep in perspective that there is much they can enjoy as a kiddo with food allergies, and all their favorite foods on Thanksgiving are a great beginning!

Now it’s your turn. Share your suggestions or post links to your allergy free recipes here!

Strawberry-Rhubarb Cobbler {yum}

Rhubarb Cobbler


I am a lover of all things rhubarb. It reminds me of summers long-past—of Big Wheels and pig tails.  You get the idea.

Last year, to our great delight, we discovered we had a rhubarb plant in our yard.  Not terribly impressive to look at but folks who know me are impressed that something is still living in my yard. I am the anti-green thumb in our family.  Sad, but true.

However, my family has told me that there is a redemptive quality to being able to cook other people’s food from other people’s gardens. I’m going with that.

Not impressive to look at but it sure tastes great in cobbler

Not impressive to look at but it sure tastes great in cobbler


I have several able and willing (most of the time) helpers here and the last time I made this delicious cobbler, it was sweet Sydney (age 8) who gave me a hand.  Here’s how we made this wonderful summertime treat:

Screen Shot 2013-08-12 at 1.51.42 PMCut off the parts of the rhubarb that look like Heidi grew them in her garden.  Usually this is either end.  Wash and rinse.

Screen Shot 2013-08-12 at 1.31.59 PM

Add the rhubarb, sugar and lemon juice.  Mmmm.  It’s looking yummy but it will not be good to eat at this point.  Ask Sydney.  While you’re letting that sit, cut up the strawberries and add them to the bowl.

Now it’s time to make the dough.  Let me just say… {yum} because that’s the only thing to say at this point.

Cobbler dough

Most traditional recipes call for lard in their cobbler. We switched to coconut oil about a year ago.  It’s better for you and it tastes better, too.  We use it in almost everything now—from savory meals to desserts.  The flavor is fantastic and it’s better for you.  I was surprised how easily we were able to substitute this awesome oil.  If you’re thinking about making a switch, this is a good recipe to try coconut oil out in.  You won’t be sorry!

IMG_3079

If you don’t have coconut oil, you can use shortening or lard.

Once your dough is mixed, it’s time to add the fruit to your pan.  Be sure to butter it first. Yes. That would be the right thing to do.

Screen Shot 2013-08-12 at 1.41.31 PM

Spread it out evenly so that the entire pan is drowning in fruit.  Double-yum.  Take your dough pieces and spread them out evenly all over the top of the fruit so that it looks like the picture at the top.  Yeah.  That’s gonna be good.  For good measure, you can sprinkle a little more sugar over the top.

Dessert paradise is coming your way.

Put it in the oven at 350 degrees for about 40 minutes, or until you see the top begin to brown. You might want to check it at 30 minutes, just to be on the safe side.

A wagon ride is a good way to spend the oven-waiting time.

IMG_3106

When your cobbler is done, we {highly suggest} serving it with ice-cream or home-made whipped cream & vanilla.  {yum.}

Enjoy!

Here’s the recipe, without all the fluff:

Pre-heat oven to 350 degrees

Fruit 

4 cups rhubarb, washed and cut into small pieces
2 cups strawberries washed and cut
1/2 tsp salt
1/4 cup sugar
3T lemon juice
1 tsp vanilla or almond flavoring if you’re feeling adventurous.  I like the almond.

Dough

2 1/2 cups flour
1 tablespoon baking powder
1/2 cup coconut oil or lard
1/4 cup butter
3/4 cup milk (give or take, mix to desired consistency)
1 egg

Let the fruit mixture sit while you prepare the dough.

In a separate bowl, combine dry ingredients. Fold in the oil and butter with a wooden spoon or a pastry cutter if you have one.  Beat the egg and milk together and add them in until you have the desired consistency.  I like my dough a little on the soft side.

Put the fruit mixture into your buttered pan.  Tear the dough into little pieces and place all over the top until you have a “cobbled” look to your dish.

Place in the oven and bake until hot, brown and bubbly, about 30-40 minutes.

Here’s to summer eatin’ and memories to go with them!
signature-heidi