Tag Archives: non-traditional homeschooling

3 Frequently Asked Questions About Notebooking

When I started homeschooling in 1998, I did the only thing I knew how to do:  I set up a “real” classroom in our and ordered a million dollars worth of workbooks. (At least it felt that way.) And we did okay … for a while.

We were about six months into it when I began to notice that the “life” I had longed for was just not happening with the workbooks. For the kids, it was just “business as usual,” as we went about our school day; there was no chance for creativity outside of the prescribed worksheet.  They seemed bored and disinterested.  Another thing that frustrated me was that each one of my children was studying something different; the first grader and third and fifth-grader were all doing a different era of history.  Different sciences. Even different Bible lessons.

I was frustrated. I was hoping for more “togetherness” in our studies and less fragmented days.  I didn’t miss the craziness of taking my daughter to school every day.  I was hoping for more of a “one-room schoolhouse” approach in our homeschool, and having so many different workbooks and textbooks was not answering my heart’s cry to simplify our learning together. So, I began to search.

schoolroom-6966

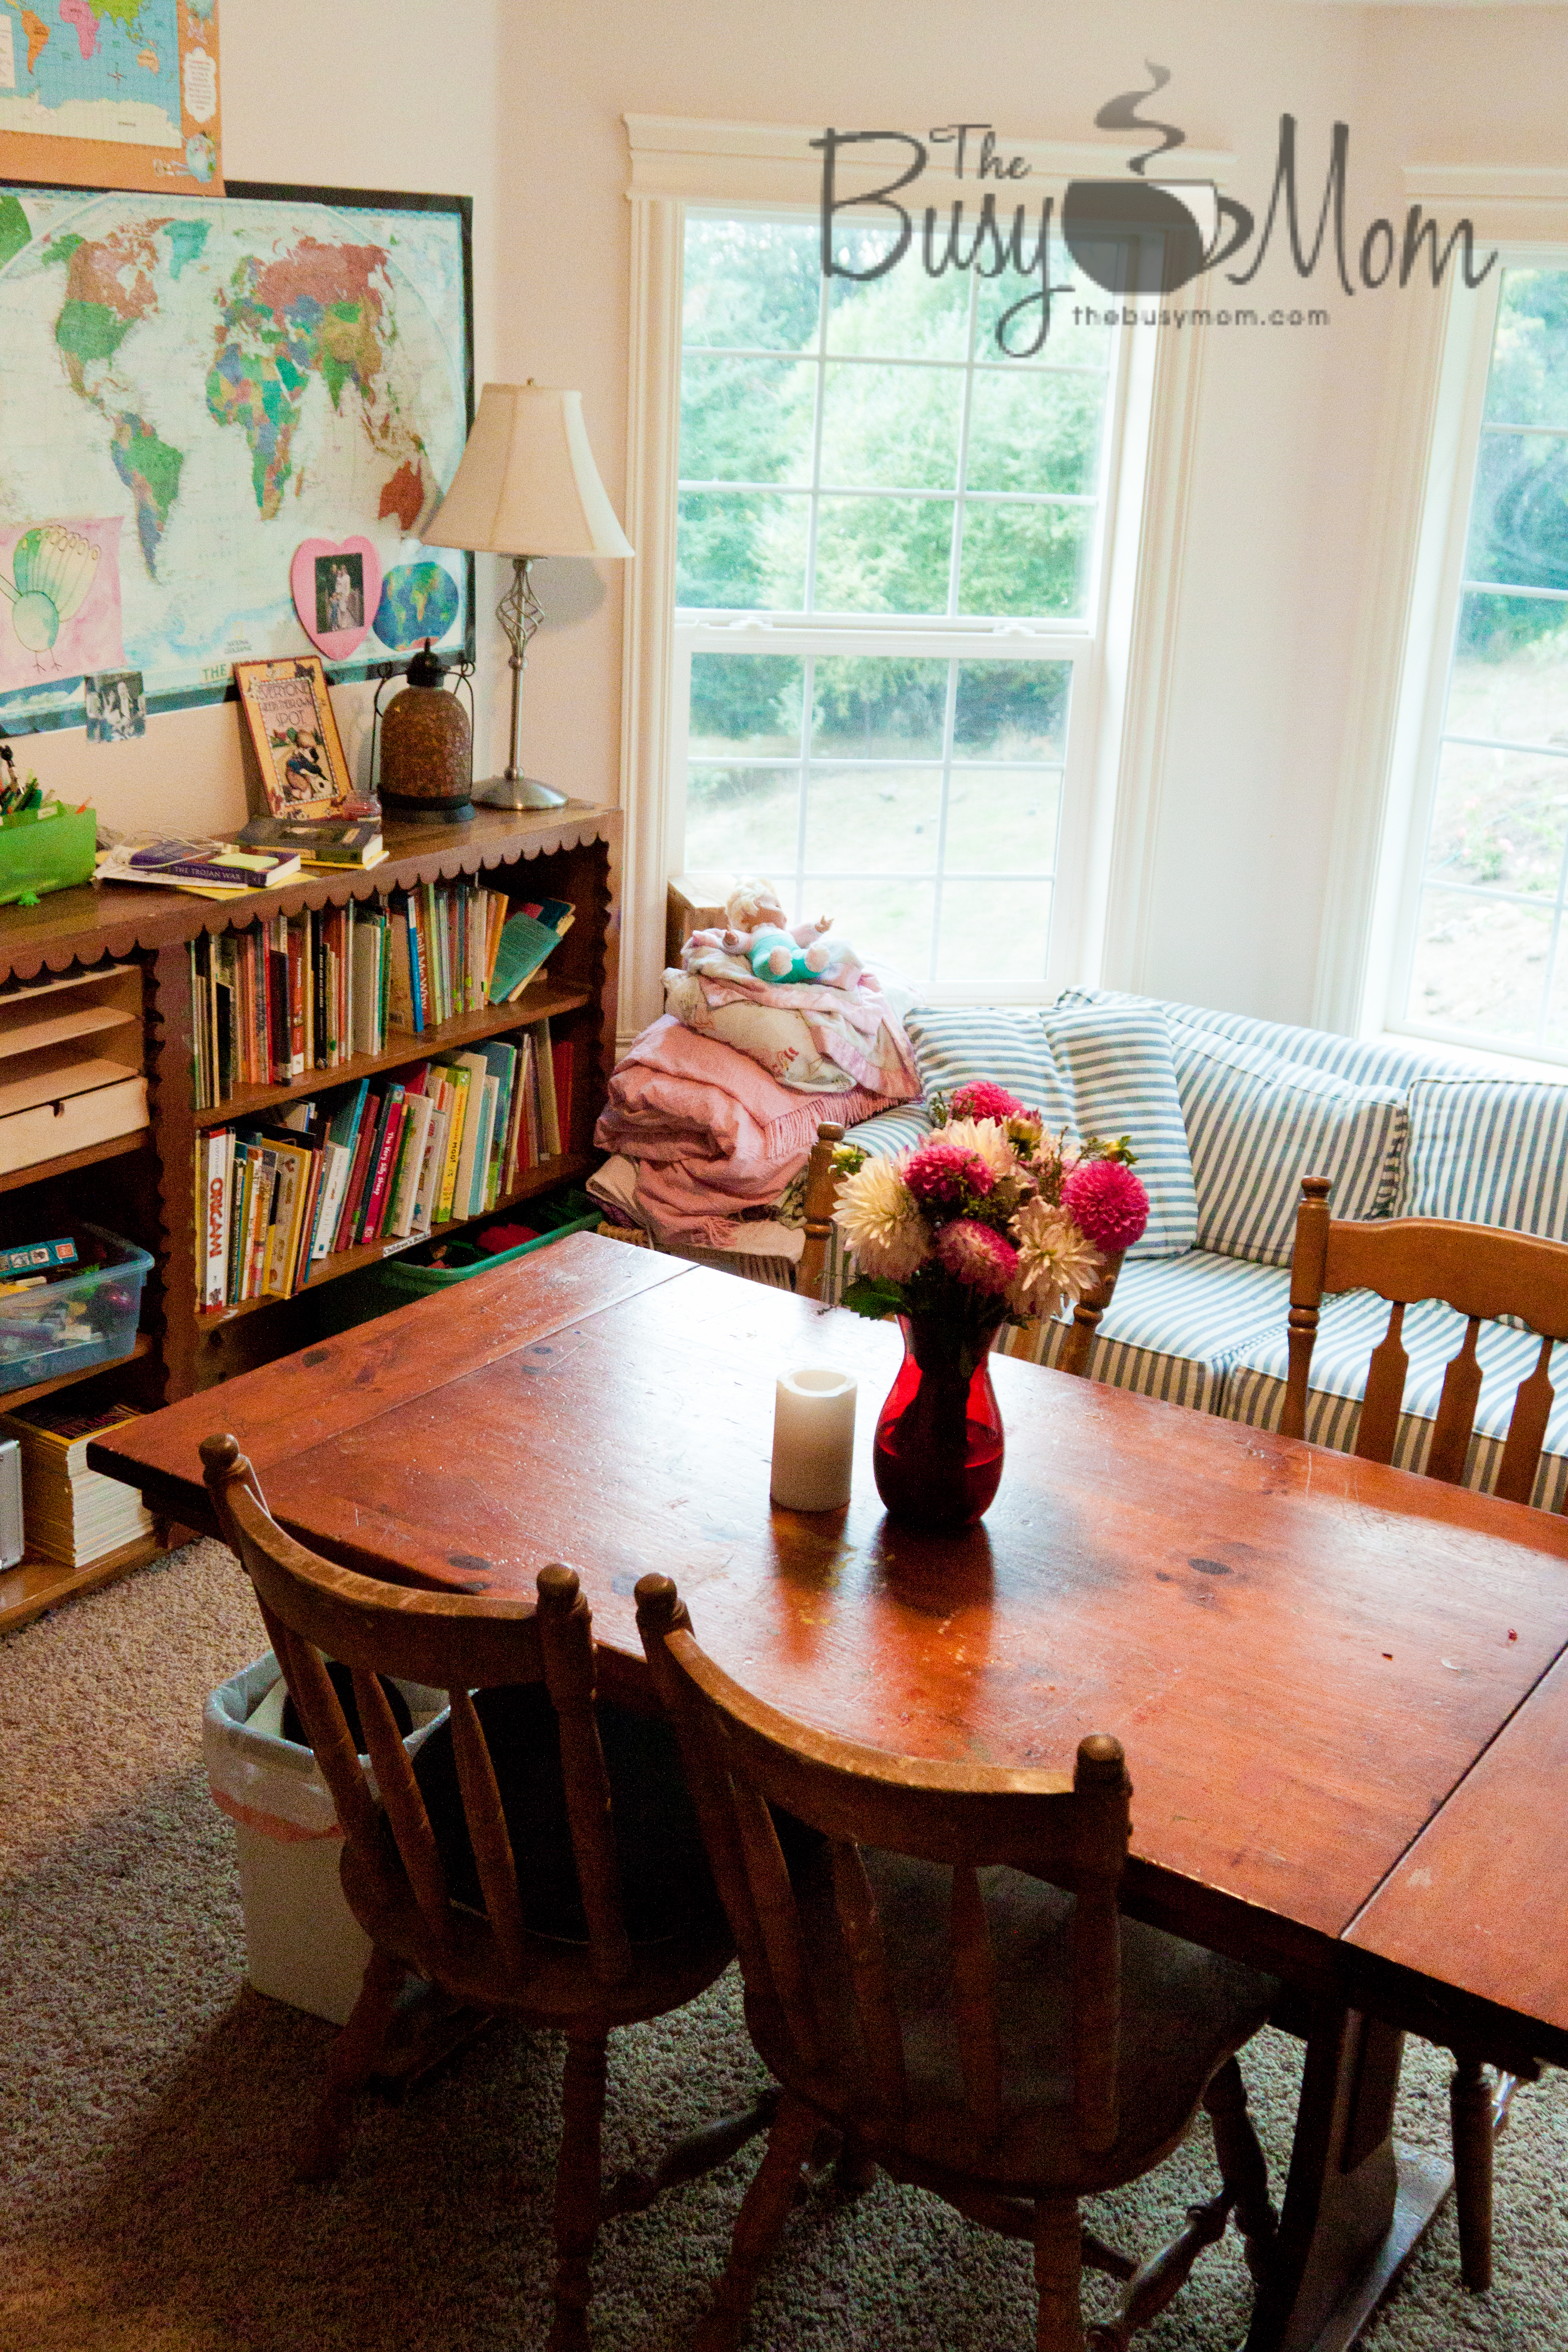
Our schoolroom—tidier than usual. 🙂

It was 2005 when I discovered something called lapbooking. (I love lapbooking so much that I wrote an eBook on the subject.) Shortly after that, I learned about notebooking. These two things literally changed the way we homeschool.

If you’re looking for a way to simplify your homeschool, keep reading. Notebooking might be just the answer you need.

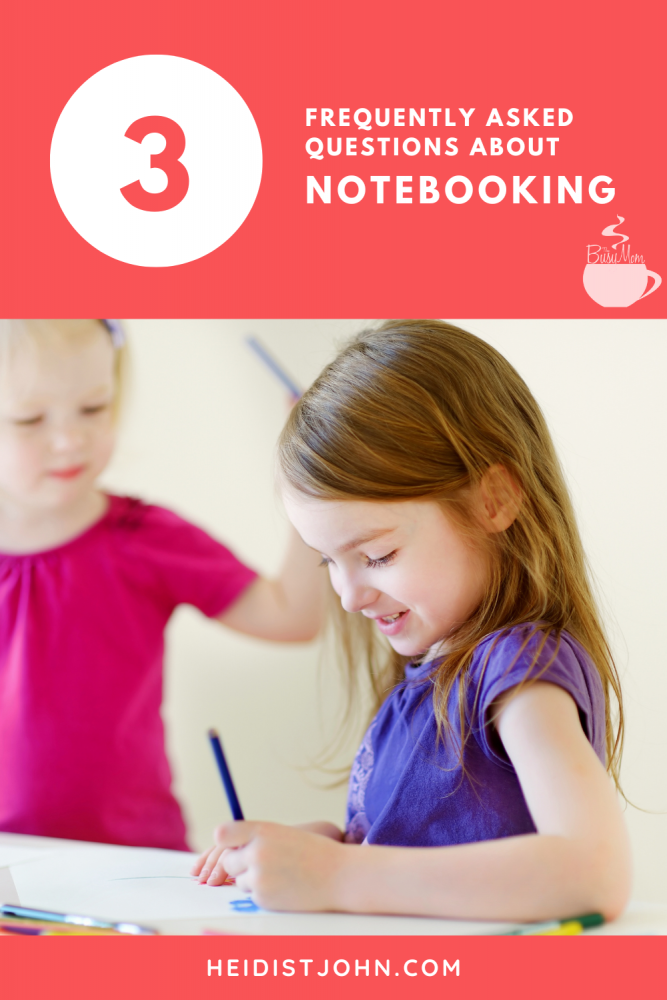
 What is Notebooking?

This is by far the most frequently asked question I get when it comes to notebooking, so I’ll make this as simple as possible.  🙂

Notebooking is simply teaching your child to write about and illustrate what they are learning in school. Notebook pages are stored using a 3-ring binder and sheet protectors. You can use pre-made notebooking pages or, you can use my favorite method—which is to let the child design it.  Original is always better than not, right? 🙂

Over the years, we have done a mixture of these kinds of notebooking.  I also keep a few pages here and there of traditional “workbook” pages in their notebooks. It serves as a reminder and *proof* that we’ve actually accomplished something that year.  Occasionally I will open the notebooks to remind myself.

Allowing the kids to create their own layouts started rough but ended beautifully

Allowing the kids to create their own layouts started rough but ended beautifully

A few other FAQ’s about this:

What do you  use?  I use 2″ or 3″ binders.  They can be found on sale all the time over at Amazon and of course, you can find them at your local Walmart.

When do you notebook?  We do it one day a week.  I keep a running list of the things we are studying on a whiteboard in our kitchen.  We take one day each week to create notebook pages. It’s not something we do every day. (Do you feel relieved yet?)

How do I start Notebooking?

Every family who notebooks does it a little differently.  At our house, we notebook just one day each week.  Usually, we do it at the end of the school week. I’ll try to break it down for you a little by putting it into steps.

  1. Keep a running list of the things you’re studying.  We write them on a whiteboard.  For example, last year during a week in October, we studied:
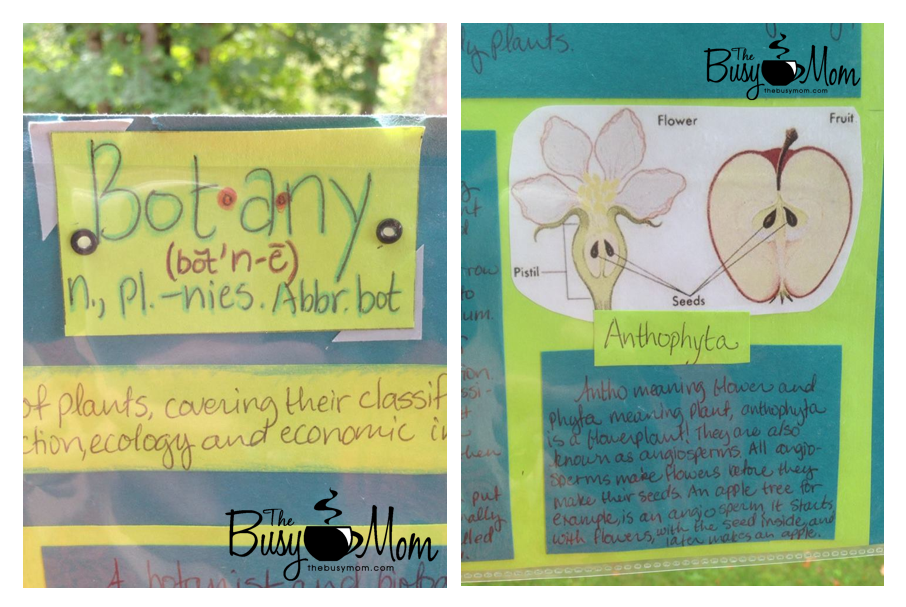
    1. the parts of a flower
    2. Joseph is sold into slavery (Firmly Planted, Book 2)
    3. Times Tables the Fun Way
    4. The Civil War
  2. I let my children choose things off the list to write about based on their age.  For example, the 3rd grader chooses two things that really made her eyes light up.  She will make two notebook pages about those two things.  The older they are, the more pages they can create.  Four is about the limit for “original” pages, so if you have a high schooler, you might ask them to create a page about each of the four things I listed above.
  3. We make a mess.  Messes are good when they’re signs of a creative, engaged child!  Get out the cardstock, glue, scissors, sheet protectors, colored pencils and crayons.  Let your children be creative.
  4. Create a page! Sometimes, I use notebooking templates that I find on the internet, or I create my own on our home computer.  My favorite way by far to create pages is to simply let the children make their own.  You’ll need to show them examples, and if they are young, you’ll need to help them draw lines, etc., but after that, let them spread their creative wings and fly!
  5. When notebook pages are done, put them in sheet protectors and put them in your binders.  Don’t forget to put a DATE on each page!  I like to keep our binders in chronological order.  It really helps with reference points at the end of the year.
  6. Add other pages you are doing in school; the occasional math page or language lesson.  All of these will serve to help you create a wonderful portfolio of your child’s work. They’ll love looking back over it.
Use what you have around the house to create pages. The one on the right is computer made.

Use what you have around the house to create pages. The one on the right is computer made.

 Favorite Resources For Notebooking

These are a few of my favorite things:

Bottom line: Notebooking can help you be more creative with your children, learn more and enjoy it more. Give it a try!

Page from a study on botany (L) and cover for our second daughter's 9th grade notebook.

Page from a study on botany (L) and cover for our second daughter’s 9th-grade notebook.

You’ve got this,
signature-heidi

Heidi St John Homeschooling Guide to Daylight

Shop Heidi’s Amazon Store for Homeschool resources, recommendations, and more!

A Few Tips to Homeschooling a Wide Age Range

One of the biggest challenges I find with homeschooling is scheduling it all in. Even if we don’t have a super set and outlined schedule, it’s still one of the biggest stressors when it comes to the homeschool year. I want to make sure I fit in everything, but I also want to make sure I’m not overwhelming anyone. I tend to let my kids lead in that realm of things, as far as how much they can do. I set the guide because we do need to cover certain things each year, but beyond that – it’s up to their ability and desire.

We usually end up doing much more than I had planned because my kids are eager learners and love to read. Often times at the beginning of the year I’m shocked at how much we have planned for the year. I believe that our relaxed approach to our schedule is a huge contributing factor to them having such a love of learning.

The next challenge is the wide age range of my children. My eldest is in 8th grade, then the next of my kiddos is in 1st, followed by my little one who is 3. I guess the three-year-old would be considered preschool or toddler school level.

As you can see, we have a pretty big age range. You might have more kids which might mean you have several kids in multiple different grades, more than I do.

So, how do we face head on homeschooling a wide age/grade range?

First things first

See if there is anything you can teach all of the kids together. For instance, if your 8th grader is studying American History, why not have your younger children study American history too? They don’t have to do it at the same intensity or depth as the older one, but they can still do it. Many curriculum options out there offer this flexibility to tailor their curriculum for older and younger students to use at the same time. But if they don’t have that option, you can easily relay the information to your younger one in a manner that they understand.

Next, keep your schedule super simple.

For us, this is essential. And as more of my kids are heading into school age, it’s been a huge life saver for us.

I have a rather untraditional schedule with my kids. It works for us and it helps me teach each of them according to their needs without feeling like I’m overwhelmed, overwhelming them, or missing anything.

My approach: I don’t teach every subject every day! That’s right. We have designated days for our more meaty subjects. This allows us to focus on one topic at a time and allows me to spread myself amongst my kiddos to give them the best attention I can.

So, how does this look you’re wondering?

Let’s say we do Math on Monday, History on Tuesday, Science on Wednesday, Language Arts on Thursday, and Foreign Language on Friday. That’s just a sample of what it could look like. Many wonder – but what about constant practice? What if they forget skills from one week to another until that subject day arrives?

Here’s how we prevent that:

Using the example above, Math would be taught on Monday. We would work through the lessons and then practice with our worksheets. I would work with the older student first and work my way down through the younger ones.

Then Tuesday comes along and we’re on to History, but before we start History we do another Math worksheet. Our math program offers 5 worksheets for each lesson so it happens to work well with our schedule. If that weren’t the case, I would simply create or find worksheets based on Monday’s lesson.

This way, they are refreshing and practicing their newly learned concepts all week, but just with a simple worksheet which takes maybe 5 or 10 minutes. They’ve taken the core of the lesson on Monday – leaving the rest of the week for practice.

Back to Tuesday, when we’re on History. After we do our Math worksheet we do our History lesson and discuss it. We do some map work and really dive in to any discussion questions that we may have. But we don’t just forget about it until next week. On Thursday we would have a brief discussion with my youngest about what we learned on Tuesday and I’ll have my big kiddo write down a paragraph or two. Catering to their capabilities.

This keeps things fresh in their heads, allows for time for it to really soak in for a day or so, and allows for me to see how much they have retained. It’s a super chill approach to learning that we have grown to love.

If this schedule just does not appeal to you, I have another suggestion. We’ve tried this method before and although we liked it, we went back to our one-subject-a-day method.

Work with your older kids first. They are more likely to have work that they do more independently than your younger ones, but may need you to either teach the lesson or at least assign them the lesson for the day should they be working on it independently. When my eldest hit 6th or 7th grade, she did a lot of her work independently and I would just grade her work and discuss it with her after.

Once you’ve finished with your hands-on lesson teaching with your older kiddos, move on to your younger ones. You’ll have the peace of mind that your older kiddos are working on their school work, which allows you time and focus to teach the younger ones.

Encourage independence as soon as they show readiness.

As I mentioned above, my eldest started doing a lot of her work indecently once she hit 6th grade, for sure by 7th grade. How did I know she was ready? It just got to a point where I realized she was ready to take a stronger hold of the reigns and work at her pace. She works much faster this way too. I think my schedule was holding her back a bit.

Total side note: This is something I just adore about homeschooling, my kids can begin to work at a pace that suits their learning needs and style so much sooner than they could in what’s referred to as a traditional school setting. But with homeschooling booming, I think traditional is changing.

Takeaways

Don’t try and teach each of them different subjects at the same time. If your kids are working on two different subjects at the same time, it should be independently. Stretching yourself into different subject directions AND grade directions will cause you to burn out.

Plan your schedule realistically. Don’t try and do every single thing every single day with each kid. It’s just not realistic. I like to think of it this way: in college, do you do every subject every day? Nope! So there is no harm in not doing every subject every day now either.

Work with the older kids first, then work with the younger ones. While you’re working with the older ones have the younger ones work on something like handwriting or maybe give something for them to color. I have a few connect the dots booklets for my younger kiddo. This keeps her busy while I teach her big sister, and helps her practice her numbers!

And finally, encourage your kids to begin working independently as soon as they show readiness. This is beneficial to them and their development. Taking ownership of their work is exciting and encouraging for them!

xoxo, Marlene
A Diligent Heart


Shop Heidi’s Amazon Store for Homeschool resources, recommendations, and more!

Finding Your Child’s Learning Style

My daughter sat, if you can call it that, splayed wildly across two chairs and chatted light-heartedly about some birds she had seen outside her window that morning.

Curious, I questioned her, “Have you finished your math?”

Exasperated, I realized that she had barely made a dent in her assignment.

Hands up if this is going on in your home?

My daughter is not generally a willful or disobedient child. She is, however, a kinesthetic learner who really does need to move in order to learn well. Moving while she does her schoolwork helps her to think and remember. These days, now that I understand the impact of different learning styles, you will find her doing her schoolwork sitting atop a large fitness ball bouncing in a crazy fashion, and finishing her work in record time.

What are learning styles?

I never gave learning styles much thought until I began homeschooling my kids. I thrived in the traditional school environment (as do many teachers). Then I began to teach my dyslexic kids and my eyes were opened to a world of learning differences that I never knew existed.

A learning style simply refers to the way a person learns best. Everyone has a mix of learning styles, utilizing all of the senses, however many people find that they have a dominant style of learning. There is no right or wrong learning style – just different. Traditional schooling tends to focus primarily on reading and writing (a predominantly linguistic or verbal learning style) to gain and assess the acquisition of knowledge. The result has been that students who have other learning style strengths tend to do poorly with these methods, earn poor grades and bad reputations for being less bright than other kids.

This has been true in my life. I found growing up that I was very good at memorizing random information for tests. I could visualize the words on paper and during a test, could choose the best answer based on this picture in my head. However, I was quick to forget this information after the test and rarely acquired a good understanding of the subject. My dyslexic husband, on the other hand, did poorly in school, yet has a much better understanding of the flow of history and science than I, having weak memorization skills but strong skill in logic.

By recognizing and understanding our own learning styles, we can use techniques better suited to our unique families. This has the added benefit of improving the speed and quality of learning.

Seven Learning Styles

  • Visual (spatial): You prefer using pictures, images, and spatial understanding. Try using images, pictures, color and other visual media to help your kids learn.
  • Aural (auditory-musical): You prefer using sound and music. Try using sound, rhyme and music in your learning.
  • Verbal (linguistic): You prefer using words, both in speech and writing. Try to find ways to incorporate more speaking and writing in your teaching.
  • Physical (kinesthetic): You prefer using your body, hands and sense of touch. Try using touch, action, movement and hands-on work in your learning.
  • Logical (mathematical): You prefer using logic, reasoning and systems. Teach the detail behind behind concepts being taught as opposed to mere rote learning.
  • Social (interpersonal): You prefer to learn in groups or with other people. Try working on lessons as a group, find a study group and use role-playing concepts you are trying to learn.
  • Solitary (intrapersonal): You prefer to work alone and use self-study.

Research has actually shown that each learning pathway uses different parts of the brain. By involving more of the brain during learning, it is easier to remember what is being taught. This is often referred to as multi-sensory teaching.

If you are experiencing difficulties in your homeschool, you may want to go online and take one of the many free learning style assessments available.  And don’t forget to test your own learning style.  Sometimes our learning style as the teacher does not appeal to the learning style of our kids.  Understanding learning styles will help you to think outside the box and find a method that works for both of you!

Roadblocks in homeschooling are often an indicator that it is time to change things.  If your kids are struggling with their homeschooling, maybe it is time you considered the learning styles of you and your children.

Heidi St John Homeschooling Guide to Daylight

Shop Heidi’s Amazon Store for Homeschool resources, recommendations, and more!


Planning a Family Road Trip? 10 Things You Need to Know Before You Hit the Road

10 Things You Need to Know When Planning a Family Road Trip

In 2009, our family took our first cross-country road trip. Since then, we have logged almost 70,000 miles together as a family, criss-crossing the United States many times.

For our first trip, we purchased a class “C” RV that our daughter found on Craigslist. It was built in 1987 (a good year, since that’s around the time we graduated from high school, right?) and had a low odometer reading of about 30,000 miles. At 27 feet long, it wasn’t too long. The reason we bought this one was two-fold:

  1. It had two sets of bunkbeds in the back instead of a master bedroom.
  2. It slept up to ten… not comfortably, but it could be done.
10 Things You Need to Know Before You Roadtrip

2009 – Green Roadtrippers

I could write for months about the RV, and indeed, I might—but I have met so many parents who want to roadtrip with their kids that I think for this post, I’ll cut to the chase and give you some practical tips. If you’re homeschooling, a word of caution for those of you who think you’re going to be “roadschooling” and that it will look even remotely like regular school.

It won’t.

Also, my husband did not appreciate our lack of privacy—but that’s another post for another day.

As I write this, we are on our way home from a long four months of travel. As an author and speaker, we depend on this time of year, as it’s the “busy season” for conferences. Our travel is what supports our family in many ways—but we didn’t start out that way. We started out with a desire to reach out and touch other families… and along the way, we discovered a new way to live.

Traveling together is not easy, but oh, it’s worth it. It’s family-strengthening, maddening, memory-making magic. You won’t regret it hitting the road with your family—but there are a few things that I’ve learned the hard way that just might make it a little more magical and a little less maddening. You’re welcome. 🙂

Happy roadtripping!

  1. Homeschooling? Leave your “regular” school books at home. Really.
    When we did our first trip in 2009, every child had a bin of school work. It was perfect. And that, my friends, was a problem. After two months, I put all their school stuff, with the exception of books to read for enjoyment, into a box and I shipped them home. The emotional temperature in our RV returned to normal the very same day.Instead of your normal routine, consider offering these kinds of books to the kids when you’re on the road:

    National Geographic Kids Ultimate U.S. Road Trip Atlas
    National Geographic Kids United States Atlas
    Mad Libs on the Road

    10 Things Parents Need to Know Before Going on a Roadtrip

  2. Whenever possible, stop and see interesting things. Visit national parks. Visit local aquariums and museums. Learn the history of the places you’re visiting. Go to the ocean. Instead of spending our limited funds on places like Disneyland, we opted for places like “The Hermitage” in Tennessee, “Fantastic Caverns” in Springfield, Missouri, “Monticello” and George Washington’s home, “Mount Vernon.” Our children have seen the Magna Carta, walked the battlefields of Gettysburg and touched the Liberty Bell.*side rant* My husband and I fear for a generation of children who don’t know the history of the United States or the path to freedom that was so hard-won. It’s not enough for us to expect our kids will learn all they need to know about our history from textbooks. Nothing can take the place of actually being there.Make some *real* memories instead of asking the kids to write about what they’re “learning” on the trip. Trust me on this one. They’re learning.
    RV_trynewthings

    First time seeing the Gulf of Mexico (2009)


    Rare weekend off the road Tennessee Aquarium (2016)

    Rare weekend off the road Tennessee Aquarium (2016)


  3. You don’t need to think of everything when you’re packing. Forget your allergy meds? Need vitamins? Forget underwear? Leave a kid behind? (just kidding not really) Here’s the thing: in most cases, you can always get what you left at a store along the way. Stop freaking out. You will forget something, so expect it.  Wal-Mart is your friend. And speaking of when you pack…
    Free laundry facilities at a state park near New Orleans for the WIN!

    Free laundry facilities at a state park near New Orleans for the WIN! (2009)


  4. Less is more. I took everything and the kitchen sink with me on our first trip—because I didn’t know that it was more realistic to think of myself as the “motorhome mama” that I inevitably turned into whenever I didn’t feel like using all those “necessary” items. I mean to tell you, that Pampered Chef microwave cooker (which I paid top-dollar for) taunted me from it’s place in the cupboard every time we ate at Taco Bell or cracked open a skillet meal from Costco. In 15,000 miles, I used it twice. Two years later, when we swapped our class “C” for a class “A,” I brought three things I knew I would use: an electric griddle, a single serve coffee maker (saved us a million bucks in Starbucks) and my crockpot.
    Take what you will use with ease! (2011)

    Take what you will use with ease! (2011)


  5. Protein > Carbs. When you’re on the road for hours at a time, avoid snacks that are rich in carbs. Carbs make kids wiggly and wiggly kids do not last long on the road. We stock our car cooler with hard-boiled eggs, cheese, jerky, nuts, and veggies when we can. And just in case you think I’m no fun at all, we do indulge in bite-sized candy bars and local sweets. But trust me. If you can keep simple sugars and carbs low, your kids will last longer … and so will you! Check out this travel snack pack!
    Maps like this are must-haves... if you have the window space!

    Maps like this are must-haves… if you have the window space!


  6. Hit the road early—and get off around dinner time. We’ve done it all: traveled through the night, traveled until we were all just dead on our feet. But when we started being disciplined about getting up early and getting off the road around dinner, something wonderful happened: we started enjoying the road much more!  If you think about it, it’s common sense, which makes me wonder why it took me nearly 15,000 miles to figure it out.
    This was our second RV. As you can see, we made the most of the space we had!

    This was our second RV. As you can see, we made the most of the space we had!


  7. Hoteling it? Use price-cutting apps. I don’t have time here to explain all the differences but I have found that I can stay sometimes up to 70% off using these apps. Of course, it doesn’t always work; if you’re in Yellowstone during peak season, you’ll be hard-pressed to find great deals. Favorites? Priceline and Hotwire. Our rule-of-thumb is that we like to be under $65 per night, and that the  hotel must have breakfast. Many of the hotels serve dinner and breakfast, making a higher cost worth it, especially if you’re traveling with a crew like we have done.Come to think of it, I’m going to write a post about my favorite apps for traveling. I have several that we can’t live without. This trip, we started using Air B&B … and I think we’ll never go back to just hotels again. That’s a blog post for another day.
    Always look for hotels that offer free, full breakfast. Read reviews online before you book a room!

    Always look for hotels that offer free, full breakfast. Read reviews online before you book a room! (2011)


  8. RV’ers: if you’re trying to save money, most WalMarts still allow RV’s to stay overnight for free. It’s great! Some of them even have hookups, but those are few and far-between.
    Make new friends! Here's Jay, getting to know the manager of an RV park in Alabama.

    Make new friends! Here’s Jay, getting to know the manager of an RV park in Alabama. (2010)


  9. Never take your safety for-granted. I hate to have to put this in here, but we’ve learned the hard way that the road is not always friendly to travelers. We were robbed blind in New Orleans on Father’s Day in 2009—a memory that will stay with us forever. In just twenty minutes, a group broke into our RV and stole almost everything we owned. Nothing was spared. Now, we travel with our eyes peeled, and we never leave things like laptop computers in vehicles. We put them in backpacks and keep them with us.Know gun laws in each state if you conceal carry. Stay safe out there!
    At the White House

    At the White House in 2009


  10. Carry a paper atlas with you. Phones can die. GPS systems can fail. Ask me how I know. You need to be able to navigate your way around the “old-fashioned” way. Use them, yes. But never rely on your electronic devices to get you where you’re going.


It’s been eight years since we became hard-core, homeschooling road-trippers. This year, we have traveled over 17,000 miles in our Honda Odyssey, which has pulled a small cargo trailer triumphantly from sea to shining sea. If it seems overwhelming, it is. But it’s worth it.

I have a few days left of sitting in this car … and I’ll try to put together some more tips along the way.

Happy trails!

Vinyl Travel Map

Cook ‘Carry Crock Pot

Delight-Directed Learning for ANY Homeschool {Part Five}

Welcome back to my series, Delight-directed Learning for ANY Homeschool.

delight-directed homeschool

In our first four discussions on this topic, we looked at the following ideas:

Part One: Talk to your kids or maybe just pay attention to what they talk about most. What piques their curiosity? There really are very few topics that cannot be developed into an educational experience. We often take these topics and create unit studies.

Part Two: Notice when your student gets excited by something you are already teaching. It really can be as simple as giving your student some extra time to follow a rabbit trail.

Part Three: Notice what has piqued the interest of your student and then plan a field trip based on that interest.

Part Four: Create a “fun school” jar with exciting activities you know your kids will enjoy.

This week, in my last installment, I want to expand on one last idea that I mentioned briefly in Part Two.

Fill a book basket with books on your student’s topic of interest.

Using book baskets is something I learned early on in our homeschool journey, and this method of learning serves a dual purpose.

First of all, filling a basket full of colorful picture books, interesting nonfiction books, and inspiring biographies exposes your children to different genres of literature and encourages a love of reading.

Secondly, reading is just a great way to learn. Put away the boring workbooks and dry textbooks and let your students enjoy learning about interesting topics from real, living books. Even if you do nothing else but let your child read (and read to him), deep, rich learning will occur.

Head to the library and check out books on any subject your student wishes to learn about, and then spend a day (or a week) reading all of them. You will be amazed at how much your kids learn from reading about topics of interest to them. It’s likely you can also shop your own bookshelves for books to read, too. You’re a homeschool mom; every room of your house has a bookshelf, right?

If your kids don’t read them all, that’s okay, too. But chances are good that if you take them to the library, teach them how to find books based on a topic they love, and then set them free to choose the books, they will at least look at them! Use them for required reading, free reading, read aloud time, and bedtime stories. Any time, day or night. It doesn’t have to be just during school hours. If your kids are reading about a topic they love, they will want to read (or listen to you read) about it all the time!

http://www.dreamstime.com/stock-image-children-reading-book-summer-park-image25167761

Using this method has encouraged my son to love reading for pleasure, and for school. For a long time, he didn’t even realize he was “doing school.” Today, I rarely have to make any kind of reading list for him. He devours books faster than I can supply them. Our library always has a stack ready to be picked up. And yes, there are many days that all he does for school is read. And I am perfectly fine with that.

Which brings me to the topic of working with kids who don’t love to read so much. That is another great benefit of this method. If you have reluctant readers, be patient. This method of learning may not be an immediate hit, but if you fill their book baskets with books about subjects they choose and are passionate about, it’s only a matter of time. In the beginning, they may only flip through and look at the pictures. That’s okay. Give them time. Read to them more. Help them explore things they love with books. They will come around eventually.

signature_marcy


Read more from Marcy in her Author Box below!

Heidi St John Homeschooling Guide to Daylight

Delight-Directed Learning for ANY Homeschool — Part Four (free printable)


delight-directed homeschoolWelcome back to my series on how to add delight-directed learning to ANY homeschool! You can read the first 3 installments here:  Part One,  Part Two and Part Three!

This is probably one of my very favorite ways to add delight-directed learning to our homeschool. And with summer upon us, the timing for this could not be more perfect!

Create a “fun school” jar with exciting activities you know your kids will enjoy.

The concept is super simple. Just grab a Mason jar or empty peanut butter jar — even a coffee can will work. Write your fun school ideas on slips of paper, fold them up, and toss them in the jar. On days you want to add some delight-directed learning to your day, you’ll have plenty of ideas there for the choosing.

I’ll give you a few ideas to get you started, but please — take requests from your children to add to the jar, too (that’s part of what makes it delight-directed!). Then take a break from “school” and let them choose from the jar what they will do that day. Here are 15 fun school jar suggestions to get you started:
  • Go on a nature walk with a list of items to look for (leaves, moss, animal tracks, acorns, flowers, etc.). I have a free nature printable I’d love for you to use for this. It has a scavenger hunt and journal pages for all four seasons. Download your free Nature Through the Seasons PDF.
  • Create art.
  • Do messy science experiments.
  • Collect an insect or other creature in your backyard (butterfly, moth, ants, spider, turtle) and observe it for a couple of days before releasing it. We have a box turtle that lives in our yard. My son loves to keep him around for a couple of days now and then for observation. He can tell you more about box turtles than most kids, I think.
  • Learn about how to use Word or PowerPoint.
  • Grab a camera and look for interesting things to photograph. Learn about digital photography while you’re at it.
  • Visit a nursing home with a list of questions to interview one of the residents.
  • Plant a garden. Even if you live in an urban area or apartment, you can grow herbs in a container or use root vegetables to make a table top garden.
  • Visit your local zoo or aquarium. Choose one or two animals to learn about before you go, then photograph and observe while there.
  • Find a creek or pond and collect water samples to study. Find rocks perfect for skipping and see how many times you can skip a rock through the water.
  • Visit your local state or national parks. National and state Parks offer amazing fun and educational opportunities for a low cost. We even seek them out when on vacation!
  • Learn about the history of ice cream; then go out for an ice cream cone.
  • Go geocaching!
  • Make pine cone bird feeders and hang them in a tree in your backyard.
  • Taking a walking tour of your city.

fun school jar

Heidi St John Guide to Daylight

Delight-Directed Learning for ANY Homeschool — Part Three (Plan a Field Trip)

delight-directed homeschool

Welcome back to my series on how to add delight-directed learning to ANY homeschool? Did you catch the first 2 installments? If not, please do click over to read Part One and Part Two!

This month, my tip may take just a tad bit more planning, but your students will love it!

Notice what has piqued the interest of your student and then plan a field trip based on that interest.

Last year, we were studying about the Civil War, but the part that really interested my son the most were the battles themselves. We are fortunate to live in a state with battle sites, so we sought opportunities to stop and visit them when we had the chance. As it happened, our state historical society also had a Civil War exhibit we could visit. We even planned our summer vacation to include a visit to Fort Sumter.

You don’t have to go to such great lengths to plan a field trip that will add delight to your homeschool. A simple visit to the zoo to visit the polar bears during your study of the arctic tundra or a tour of your State Capitol while learning about elections will suffice. In fact, there are so many ways to plan a field trip you might never have thought about!

Once, when my son was completely obsessed with dogs, I called the local animal shelter and asked for a tour. They were thrilled to accommodate us and I ended up planning an event for our local homeschool group. The animal shelter did a fantastic job of teaching the kids all about dogs, including safety measures, breeds, and responsible animal control. Of course, they also got to play with the puppies after!

plan a field trip

When my son was younger, like many little boys, he went through a period of being completely obsessed with jobs that required a uniform — firemen, paramedics, police officers, mailmen. I ended up planning a several week-long unit study on community workers. In one afternoon, I was able to make phone calls to all of these local offices to schedule a meeting with our local community workers. Ben was in heaven as he put on the full firemen gear, turned on the lights and siren in an ambulance, and climbed inside a police car.

Planning delight-directed field trips is limited only by your child’s curiosity and your creative planning. And they add a measure of learning to homeschooling unmatched by any book or curriculum. Any time you can add a hands-on experience on top of following the passions of your child, real learning — the kind that runs deep — will happen.

It may require a little planning to pull off a delight-directed field trip, but the memories made are more than worth the effort. Besides, great field trips are fun for the mom, too!

So, tell me . . . what field trips are you planning for your homeschool in the coming weeks?

plan a field trip

Heidi St John Homeschooling Guide to Daylight